

I’ve been developing on a mac ever since I started working professionally, however resigning from my last job forced me to use my gaming pc instead after I surrendered my macbook to my company. Switching from macos web development environment to windows maybe pain in the ass, but luckily, windows 11 already introduced WSL which you can install and allow you to run linux environment without having a separate virtual machine.
You might opt to go to a tradional route, or just use docker. But here how I set up my PC running on windows11 for web development.
Installing WSL 2
First open the command prompt and type
1
wsl --install
This will install WSL with ubuntu distribution by default. If you want other distribution you may follow the official docs here
Upon successful installation, a restart will be required for the changes to take effect.
Once you’re done with the restart, a terminal will open asking you to input your username and password. If the terminal didn’t open at the startup, you may search it in the start menu instead.
Updating Linux
The next step you need to do is to make sure that your linux packages are updated and upgraded. Do this by running this command on the linux terminal
1
sudo apt update && sudo apt upgrade
Optional: Mapping Your Ubuntu Drive as a Network Drive
For easy access on files inside your ubuntu drive, you may want to map it as a network drive
- First, open you file explorer and locate the linux folder
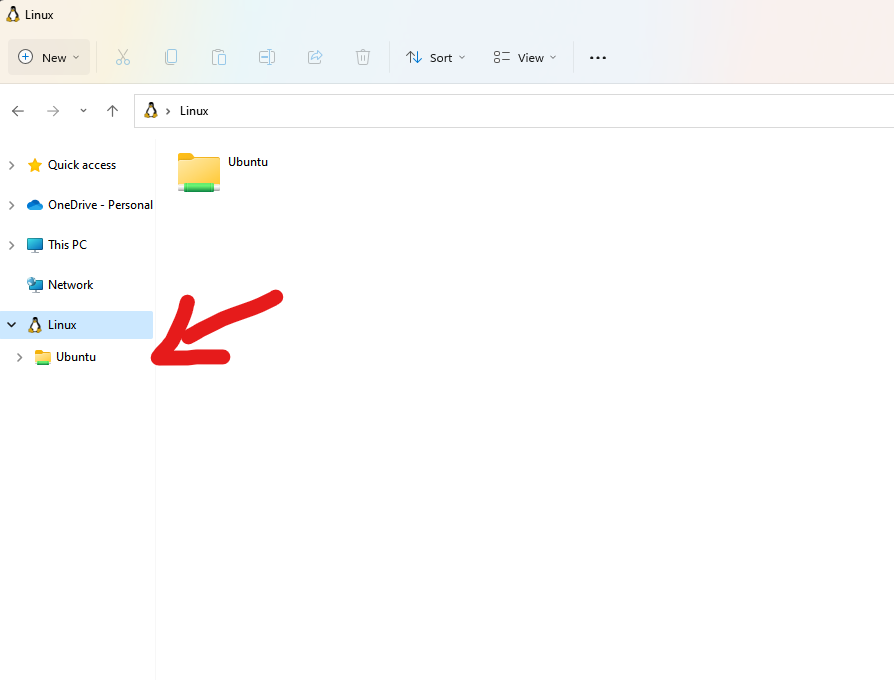
- Right click, and select map to network drive (if you don’t see the option, just click see more options)
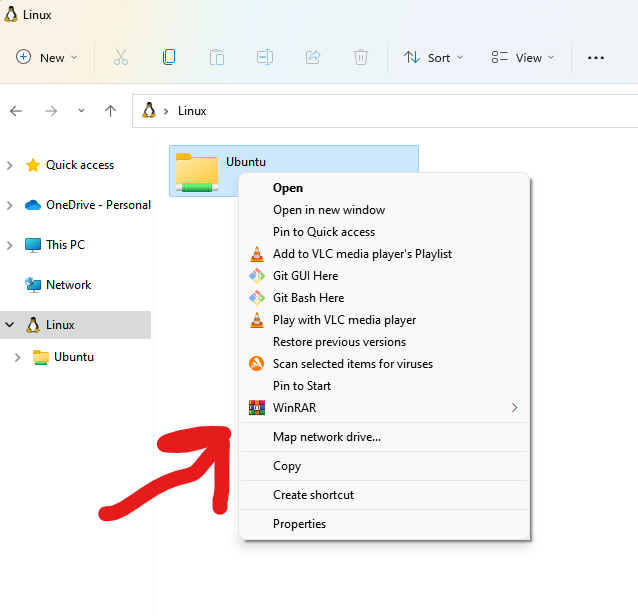
- You should see the ubuntu as a network drive in “This PC”
![screenshot]()

Setting up Linux for Web Development
The tools listed here may or may not be essential for web development. But listed here are the tools and personal configuration for my web development environment.
I’m using the preinstalled terminal application as my console choice. This is already installed in windows11 machines, but if it’s not installed in your machine, you can always get it on microsoft store.
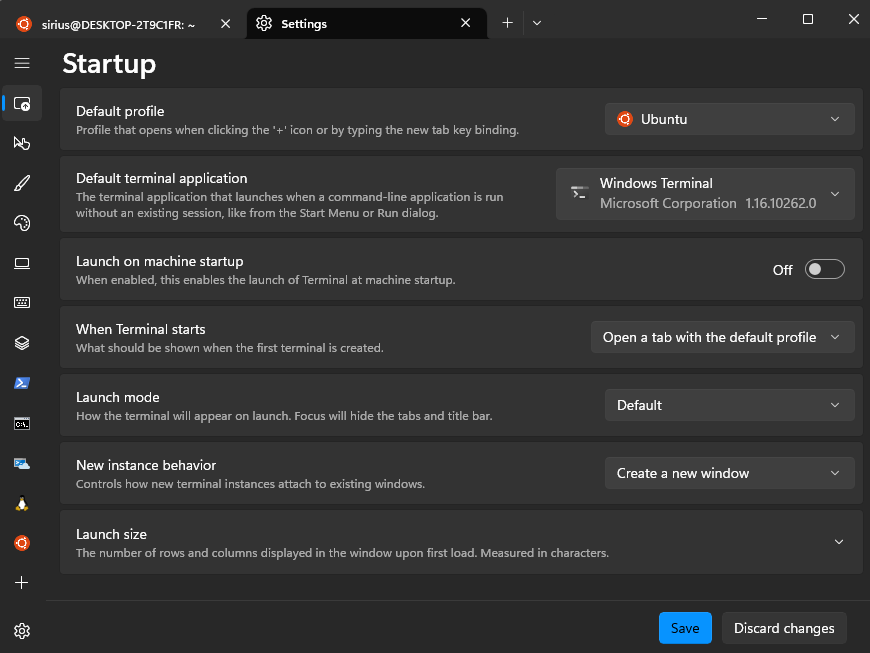
Because we’ll be primarily working on Ubuntu profile, i will set the default profile and default terminal application to Ubuntu and windows terminal
Install Brew
I use brew as my package manager of choice. Install brew by running this command
1
/bin/bash -c "$(curl -fsSL https://raw.githubusercontent.com/Homebrew/install/HEAD/install.sh)"
After installation, you need to update your PATH and add brew
1
2
  (echo; echo 'eval "$(/home/linuxbrew/.linuxbrew/bin/brew shellenv)"') >> /home/<user>/.profile
  eval "$(/home/linuxbrew/.linuxbrew/bin/brew shellenv)"
And also it is recommended to install build-essentials
1
sudo apt-get install build-essential
Install ZSH
ZSH or Z Shell is my scripting language of choice, it adds more functionalities on shell and allows plugins.
1
sudo apt install zsh
Install Oh My ZSH
OhMyZSH is my favorite plugin of zsh, installing omz includes several bundled themes and helpers already. Install omz by running this command
1
sh -c "$(curl -fsSL https://raw.githubusercontent.com/ohmyzsh/ohmyzsh/master/tools/install.sh)"
This command needs curl, if curl is not preinstalled in your linux you may install it via
sudo apt install curl
After installing OMZ, my preferred theme is agnostic. To change theme edit the zshrc file. You can use nano or vim to do this
1
vim .zshrc
Look for the theme line and change to agnoster
1
ZSH_THEME="agnoster"
This theme will require powerlines font or else you’re just going to see ? instead of symbols.
To install powerline in windows you may follow this instruction.
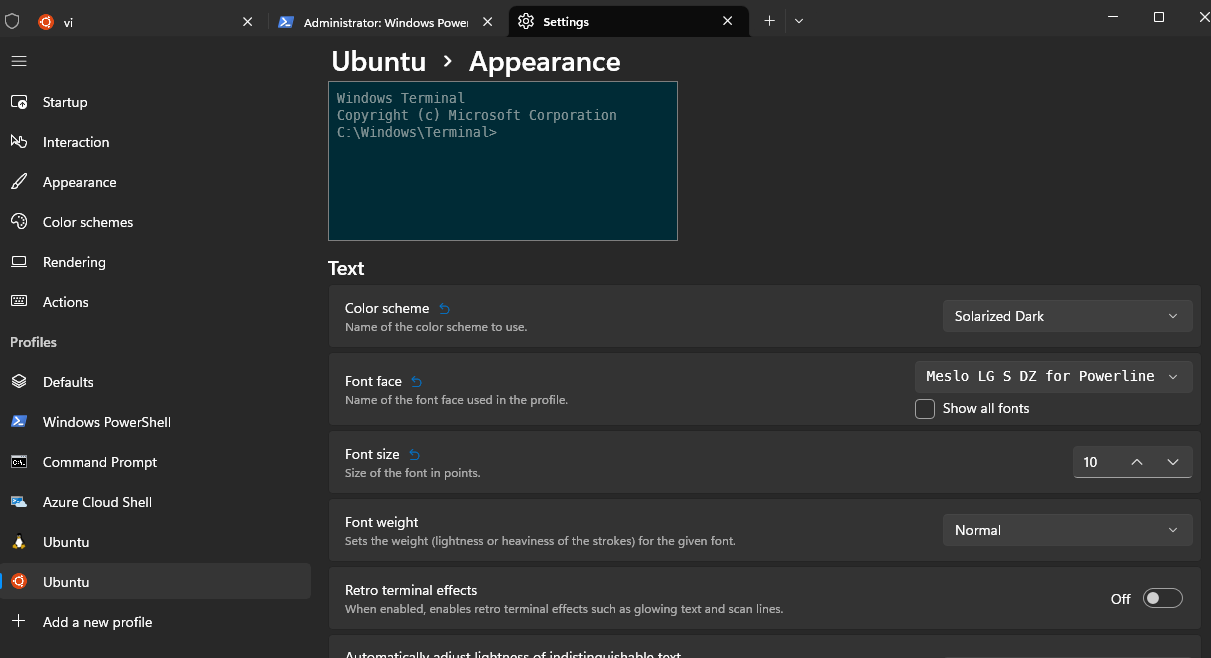
After installing the font, go to profile settings and set the following.
Color scheme: Solarized Dark Font Face: Meslo LG S DZ for Powerline Font Size: 10
After restarting the terminal, your terminal should look like this

The other two plugins that I’d like to install is zsh autosuggestions and zsh syntax highlighting
To install zsh autosuggestions
1
git clone https://github.com/zsh-users/zsh-autosuggestions ${ZSH_CUSTOM:-~/.oh-my-zsh/custom}/plugins/zsh-autosuggestions
To install zsh syntax highlighting
1
git clone https://github.com/zsh-users/zsh-syntax-highlighting.git ${ZSH_CUSTOM:-~/.oh-my-zsh/custom}/plugins/zsh-syntax-highlighting
Add the plugins in .zshrc via nano or vim
1
plugins=(git zsh-autosuggestions zsh-syntax-highlighting)
Install Git
To install git, run this following command
1
brew install git
After completing the installation, configure your git
Git Name
1
git config --global user.name "name"
Git Email
1
git config --global user.email "email"
Git Username
1
git config --global user.username "username"
Install Node
To install node, I’d like to use node version manager so that I can switch out versions also. To do that, run the following command
1
curl -o- https://raw.githubusercontent.com/nvm-sh/nvm/v0.39.3/install.sh | bash
After installation, you will need to restart your terminal. Check if NVM is successfuly installed
1
command -v nvm
Using nvm install node,I always like to install the LTS, but nvm will allow me to install different and switch out to version of node if needed.
1
nvm install --lts
Verify node is installed, it also comes with the default package manager, npm
1
2
node --version
npm --version